

Training pills — Ep 9. — Geolocation with Google Maps
We know how hard your day to day is. Planning routes is a tedious job that requires a lot of concentration and experience. From Routal.com we want to help you, that's why we launched a series of training pills to help you improve day by day. Our goal is for you to plan better, faster and more successfully.
Shall we start?
In this pill we are going to teach you How to geolocate addresses of your customers through the map provider Google Maps. To this end, we have developed a add-on for Google Spreadsheet with which you can geolocate up to 3,500 addresses daily in an easy and fast way.
In previous pills we were seeing how to improve the quality of the results (Ep. 3 Address Geocoding) and how to extract coordinates from Google Maps to be able to include them in any service on the platform. Today we will see how extract addresses in bulk to be able to improve the data quality of our service file.
The first thing is to have a free account of Gmail. Once we have the account, we can access to create a new document of Google Sheets. Once we create a new document, we simply have to go to Add-ons > Download Add-ons and in the search engine put: Geocoding by SmartMonkey. The next step is simply to install the add-on and give it the necessary permissions.
With this small process, we will have installed the add-on that we can use very easily and quickly. Let's see how to use it.
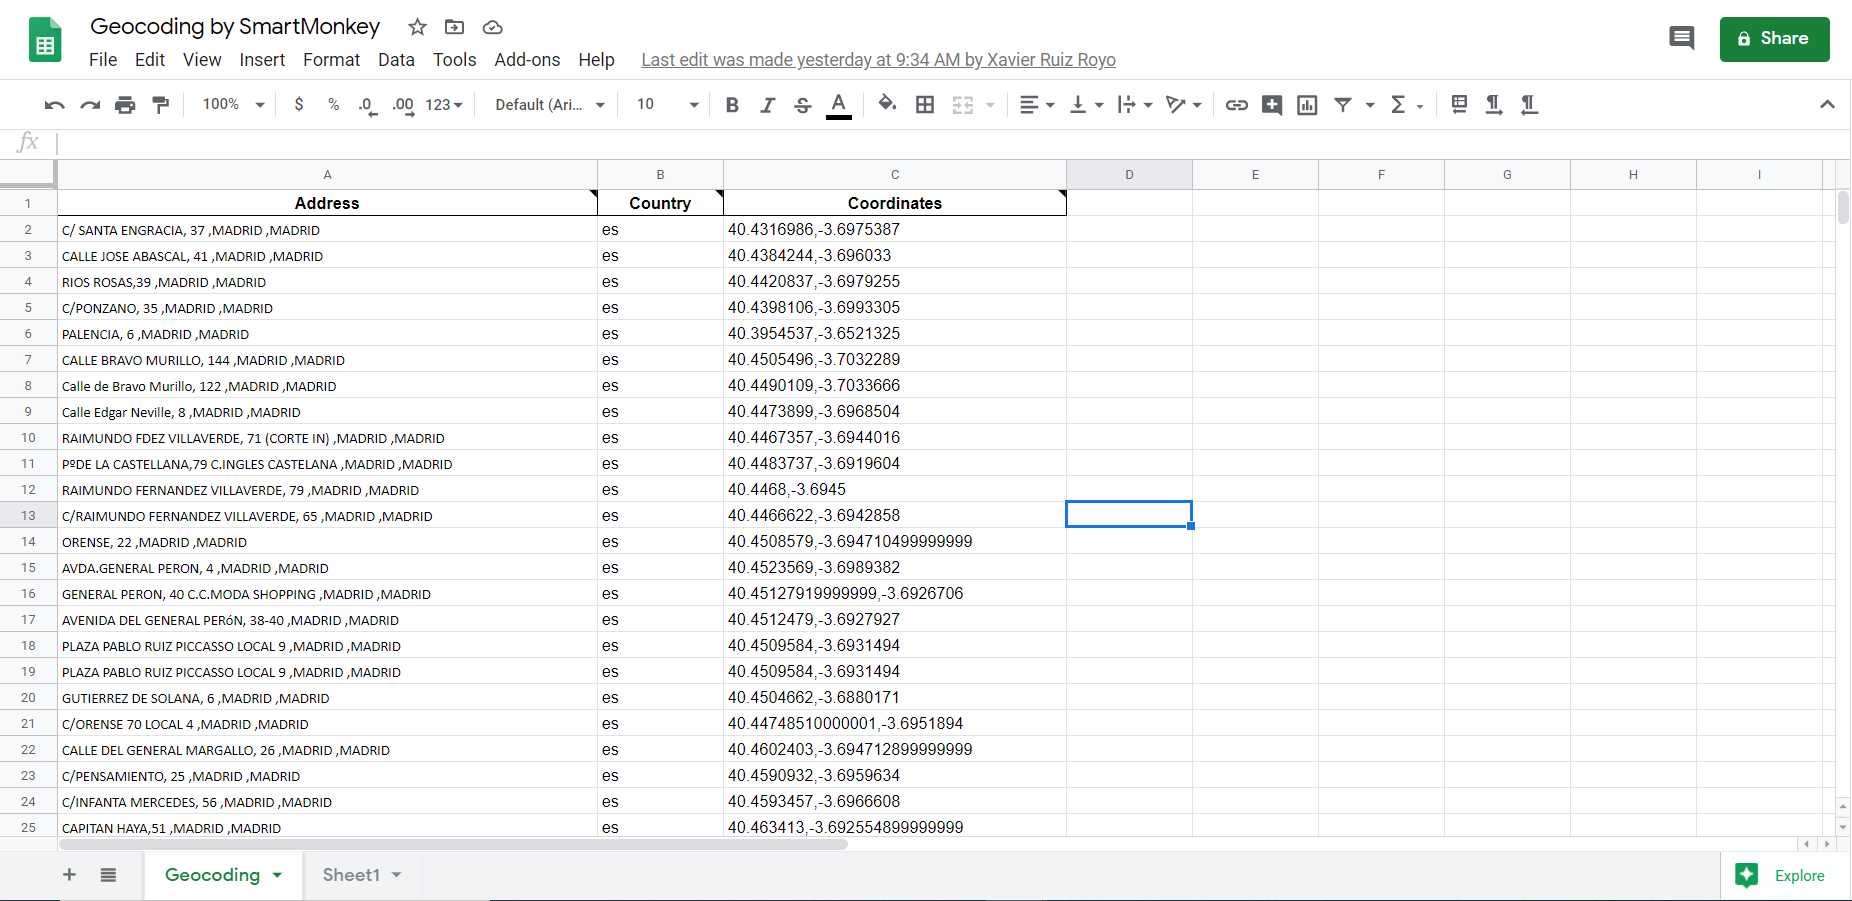
The first time we install the plugin, it will create a new page in our document called Geocoding. If we wanted to create this template in any other document, we just have to go to the Spreadsheets options, Add-ons > Geocoding by SmartMonkey > Create Template.
At this point we will have the template created. You will simply have to Fill in the addresses that you want to geolocate in column A (Address) and specify the country. You'll have to follow the naming of domains. Here are some examples:
Spain: es
Mexico: mx
Argentina: ar
Chile: cl
Colombia: co
United States: us
The next step is to geolocate. To do this, we have to click on the menu of Add-ons > Geocode by SmartMonkey > Geocode. In a few seconds, the result will appear in column C with which we can simply copy and paste it into our Excel file to be used in Highway.
In the following video I show you what the entire process is like, from installation to use on Highway.
We hope it was useful and we look forward to seeing you next week with more pills to improve your daily efficiency!
Related tags:
Read more articles:
%20(39).webp)
%20(38).webp)
%20(37).webp)
%20(36).webp)
Move the world smarter


.png)


